COWPENSSOUTH CAROLINA |
 |
COWPENSSOUTH CAROLINA |
|
The Overmountain Men prepared camp at Cowpens on October 6, 1780. However, realizing they were closing in on Ferguson, they broke camp and pushed on through a rainy night. Ferguson had prepared a defensive position atop Kings Mountain (an upcoming site on this road trip). The Overmountain Men attacked their position the next day and were successful in defeating Ferguson’s men.
Three months after the Overmountain Men achieved victory at Kings Mountain, elements of their forces returned to Cowpens to fight the British as a part of General Nathanael Green’s southern army.
|
|
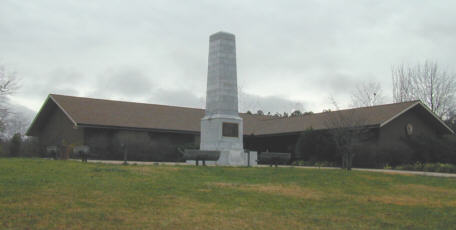
On this field, American troops under Brigadier General Daniel Morgan won a signal victory over a British force commanded by Lieutenant Colonel Banastre Tarleton, January 17, 1781. The congress of the United States has caused this monument to be erected on the site of the Battle of Cowpens as a testimonial to the valor and in appreciation of the services of the American troops on this field in behalf of the independence of their country. (Cowpens Battlefield Marker) |
In December 1780, when General Greene arrived in the south, he reorganized the Southern Army into two segments. Greene's main force moved to a winter camp along the Pee Dee River. The other segment of about 1000 men was placed under the command of General Daniel Morgan and sent west to camp along the Pacolet River southeast of today’s Spartanburg.
Because Morgan’s forces threatened the screen of British outposts in the Backcountry, Cornwallis was forced to respond. He created a reaction force of about 1100 men under the command of Colonel Banastre Tarleton with the mission to find and destroy Morgan and his forces.
The two leaders, Morgan and Tarleton, who would meet in battle at Cowpens, were an odd contrast. Morgan was a frontiersman and a teamster by trade. He was known for his experience at fighting Indians and was something of a genius at getting the most out of his men in battle. Tarleton, on the other hand, was an offspring of British gentry. He was schooled at Oxford and at the age of twenty-one, he received an officer’s commission and served in a unit of British dragoons. He volunteered for service in America and, after service in the north, was promoted to lead the British Legion, a mobile striking force of dragoons and mounted infantry.
Coming south with his mentor Cornwallis in early 1780, Tarleton took part in the siege and capture of Charleston in the spring, and the major British victory at Camden in August. Now he was commanding a reaction force of cavalry and infantry, mostly veterans, and his mission was to force Morgan back to the east across the Broad River and into the hands of Cornwallis.
Tarleton started after Morgan in early January of 1781. Rain and faulty intelligence slowed his march, but by January 14th, he was across the Enoree and Tyger Rivers and pressing hard on Morgan's forces. Avoiding American pickets, he crossed the Pacolet River late the next day, putting him within a few hours of Morgan's camp on Thicketty Creek. On the morning of January 16th, the British marched into Morgan’s abandoned camp and helped themselves to the breakfast rations left behind.
|
|
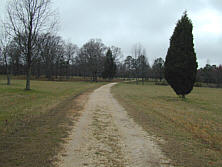
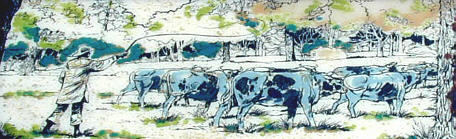
Hannah’s Cowpens A magnificent woodland of oak, hickory, chestnut and maple carpeted this rolling Carolina backcountry in the 1780’s. In the spring, thousands of cattle grazed in this region — one of many large tracts in the Carolinas and Georgia called “cowpens.” Nearby springs and lush pastures of grass and peavine made this area popular with cattlemen. Branded and fattened, the cattle were driven to East Coast markets. Trampling hooves kept the forest parklike
and free of undergrowth except along creeks and low-lying marshes — good
terrain for Revolutionary battle tactics, especially the use of cavalry. According to historians, a settler named Hannah used this cowpen. (Cowpens Battlefield Marker) |
In the afternoon of the 16th, Morgan and his men marched onto the frontier pasturing grounds known as Hannah’s Cowpens. Morgan, with a numerically smaller and less experienced force, was in a precarious position. If he crossed the Broad River to the east, most of his militia, who where tired of running, would probably desert him. If Tarleton overtook the army on the road or caught it astride the river, they could all be cut down. To survive, Morgan had to make a stand at Cowpens, where the terrain offered him some advantages. The troops, who needed a short rest and a meal, welcomed the decision.
The place where Morgan chose for battle was an open field known locally as Hannah's Cowpens. The ground sloped gently toward the south, the direction from which Tarleton would approach. At the far end of the open woods were two low crests, separated by a wide swale.
That night, Morgan went among his forces lifting their spirits and explaining what he expected of them. He assured the Patriot militia that his cavalry would protect them from Tarleton's saber-swinging dragoons, telling everyone that he, “the old wagoner,” was going to crack his whip over “Benny” in the morning.
|
Boys Get Up! Benny’s Comin’! In the frosty, pre-dawn darkness of January 17, 1781, the American camp awakened to face the oncoming British. The right flank of the American main line of defense formed within this area. (Cowpens Battlefield Marker) |
|
Morgan knew his opponent, and he deployed his troops in a way that made the most of their abilities in the kind of fighting he expected Tarleton to bring on. About 300 of his men were untested militia, likely to break before the cavalry sword or infantry bayonet. He needed their firepower, but dared not place them in a formal line of battle and expect them to stand their ground. So he devised a plan of battle that would match the capabilities of his men and the terrain.
He formed his troops in three lines straddling the dirt road that curved through the Cowpens. In the front line, he placed about 100 sharpshooters. Their job was to slow Tarleton’s advance with well-aimed fire, then fall back. A hundred yards behind the skirmishers he put the Patriot militia, under Andrew Pickens. Morgan asked them for two volleys at a killing distance and then they were free to move off the field. About 150 yards behind Pickens, stretching along the forward crest, were his crack Continentals from Maryland and Delaware and veteran Virginia militia, about 500 men commanded by John Eager Howard. These men would bear the brunt of the fighting and Morgan coached them not to be alarmed at the retreat of the militia, which was part of the battle plan. He also asked them to fire low and deliberately. If they were forced back, they were to rally on the main crest. In the rear, behind that crest, he stationed the cavalry, about 100 men under William Washington, with orders to protect the militia and be ready to ride into the fight.
An hour before dawn, word came that Tarleton was only a few miles away. Morgan alerted his men for battle and just before dawn the British stumbled onto their position. Wanting a better look at the enemy's lines, Tarleton sent cavalry forward to break up the skirmishers and quickly lost about 15 men of his men to sharpshooters.
|
As Good as Troops Can Move Once the American skirmishers withdrew, the British troops moved forward at quickstep, raising a great shout as they advanced. Carolina militiamen positioned near this spot held their ground long enough to fire two volleys. Then, as ordered, they fell back. (Cowpens Battlefield Marker) |
|
Without any pause, Tarleton formed his line of battle with the infantry astride the road, about 50 dragoons on each flank and a brigade of Highlanders with about 200 cavalry in reserve. It was still dark when Tarleton started his men toward the American line 400 yards away. As the British came within range, the militia delivered deadly fire, dropping many officers, and broke for the flanks. The dragoons on the British right pursued them a short way until a fierce charge by Washington's cavalry drove them off, allowing Pickens to reform his scattered ranks.
The British now surged on to the third line and the fighting became pitched. When the advance faltered, Tarleton ordered up the Highlanders, who soon threatened to outflank the American right.
At this point, a confused tangle of events occurred that soon brought the fighting to a dramatic conclusion. When Howard ordered his right to fall back and present a new front, the order was mistaken and the whole line began to retreat.
Observing his men in retreat, Morgan rode up and chose new ground for the Continentals to rally on. Reaching that point, they faced about and fired point-blank at the closing redcoats. The British ranks staggered and the Americans plunged forward with bayonets.
|
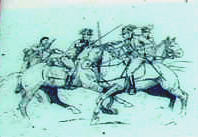
Swords Clash on Somewhere in this general area, retreating British officers, including the Commander Tarleton, clashed with pursuing American horsemen led by Lt. Colonel Washington. Historians believe a young trumpeter named Ball, one of the black patriots who fought in the Revolution, saved Washington’s life when his pistol shot wounded an attacking British officer. (Cowpens Battlefield Marker) |
|
As this was happening, Washington's cavalry rode again into the swirling fight and Pickens' militia opened a galling fire on the dragoons and Highlanders on the British left. British resistance quickly collapsed. A few dragoons rallied to Tarleton, but they could do nothing effective and followed the Legion cavalry, which never got into the fight, into full retreat off the battlefield.
It was all over in an hour. The British losses were staggering with about 800 casualties: approximately 100 dead, 200 wounded and 500 captured. Morgan had less than 100 casualties: about 10 killed and 60 wounded. With a clear American victory, Cowpens became a major link in the southern chain of British losses that would conclude at Yorktown.
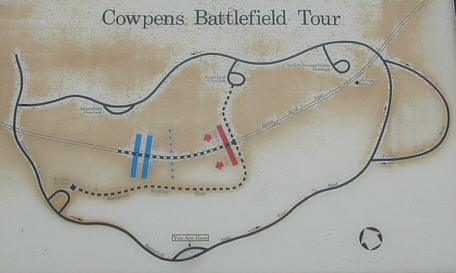
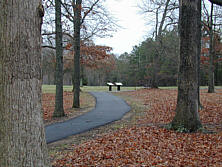
Today, visitors to the Cowpens National Battlefield can take both a walking tour and driving tour of the battlefield area. The walking tour begins at the Visitor Center and passes through the right flank positions of the Continental and Militia forces. The tour continues on the south side of the battlefield until it reaches the British side then returns back to the Visitor Center on the original road through the center of the battlefield area.
The road tour, which is about three miles in length, circles the battlefield area. It includes a visit to the Robert Scruggs House, which is on the original road at the entrance to the battlefield area. The road tour also includes an overlook on the north side of the battlefield and the site of Morgan’s camp.
The battlefield grounds are open from dawn to dusk. The Visitor Center is open from 9AM to 5PM daily except Thanksgiving, Christmas and New Year’s Days.